In this tutorial, we will study how to install java on windows 10, Java installation in Windows Operating System, How to check the version of installed and Setting up Environment Variable. So let’s start.
How to Install Java on Windows 10?
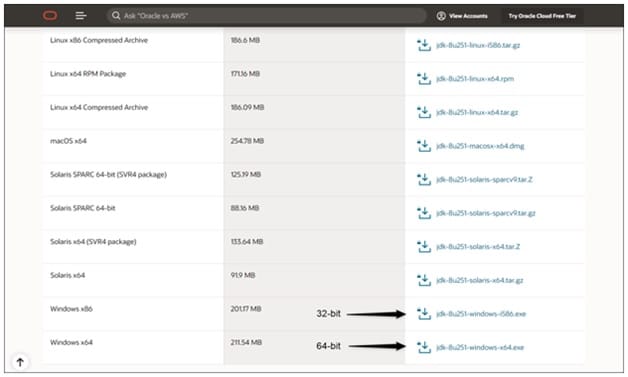
Java has support for many platforms like Windows, Linux, Solaris, etc. These platforms have their own installation methods. In this tutorial, we will be covering the installation procedure Windows operating system for both 32-bit and 64-bit OS.
Java installation in Windows Operating System
In the Windows Operating System, both 32-bit and 64-bit Windows OS have a similar way of installing Java. The main difference comes with their installation packages.
How to check the version of Java installed on the host machine?
Today’s software applications and programs need Java to run and execute properly. This software and programs require Java to be installed on the system to properly get executed. So if you have one of these applications or software installed on your computer then you possibly might also have Java already installed on your computer.
To check whether you have Java installed on your computer, follow this simple procedure,
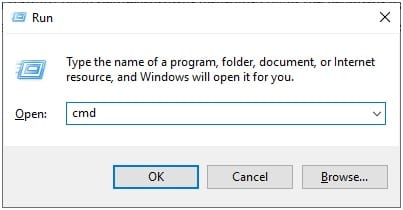
- On your keyboard, press Windows + R. This will open up the Run dialog box on the bottom left of the screen.
- In the textbox on the Run dialog, type cmd and then click OK. This is open to the Command Prompt (CMD) window.
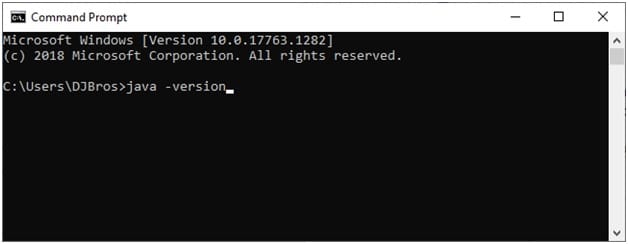
- In the Command Prompt, type java -version(make sure you type it correctly) and then press Enter.
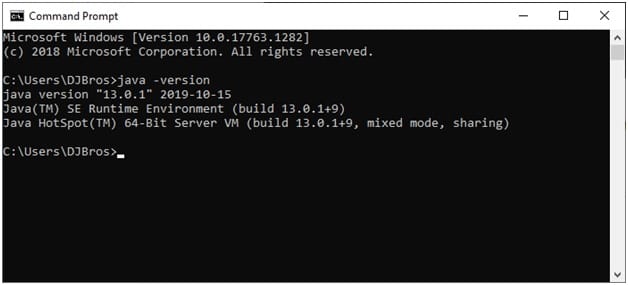
- If you see the output similar to the output given below with some Java version, then you already have Java installed on your computer and there is no need to continue with the further installation steps.
- In the other case, if your output in the Command Prompt is not similar to the output given above, then continue with the next step.
Step 1: Know the type of operating system you have
An important step to installing Java is to know the type of operating system you have on your computer. The Windows operating system comes in 32-bit and 64-bit architecture in the market. At this point, if you know the operating system type of the host machine that needs Java installation, then you can continue to the next step. If you are not aware of the system type for your operating system, continue following these steps:
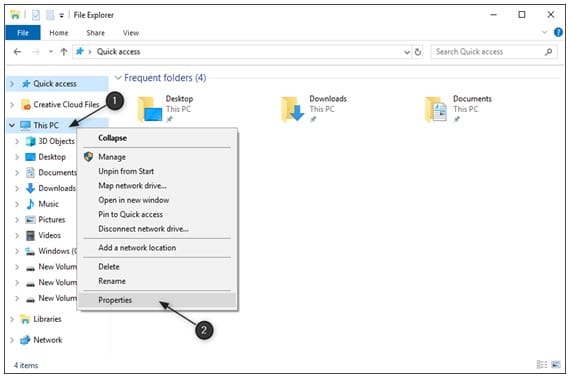
- Open File Explorer that comes with your Windows operating system.
- On the left side panel, Right-click on This PC to open the context menu and then click on Properties.
- This will open up the System Properties of your computer. Now, under the System section, check out the System type of your computer.
Step 2: Download the Java Development Kit (JDK)
- Go to the official Java website and browse through the JDK packages available in the given link below.
Link: https://www.oracle.com/
- After opening the given link, scroll down the page and click on the appropriate download link based on the host operating system that needs Java installation.
- A pop will appear for you to accept the license agreement. You can read it just in case you want to know more about their terms and conditions. If you are satisfied with the Terms and Conditions/License Agreement, then select the checkbox accepting the license agreement and click on the Download button (in green).
In case you don’t have an Oracle account, follow this link to create a new account. Link: (https://profile.oracle.com/)
- Once the Java installer is downloaded, open the installer package, and follow the installation wizard. You can configure the installation to change the installation path if needed. But it is recommended to let the default installation settings during installation.
After completion of the installation, just repeat the part ‘How to check the version of Java installed on your computer?’ to make sure everything went well.
Setting up Environment Variable for Java
Windows operating system uses Environment variables to access externally installed applications and programs. Environment variables are Key-Value pairs. Each Key represents one or more resources or applications or programs. These Environment Variables are mostly used by the operating system and other applications to access or use an external application or program.
In this section of the tutorial, we will set environment variables in Windows operating system so that the host system can have access to Java and its libraries. By setting up Environment Variables for Java, we enable Java to be used as a global command in the host machine.
Setting up the Environment Variables for Java in Windows 10?
- Locate the Java installation on your PC. By default, Java can be located in one of these directories:
C:/Program Files/Java/jdk-<version>/bin – For 64-bit OS
C:/Program Files (x86)/Java/jdk-<version>/bin – For 32-bit OS
You need to copy the location of the bin folder in the directory where Java is installed. You can make sure you have selected the right folder if it has both Java and javac.
- Open File Explorer/File Browser that comes built-in with the Windows operating system.
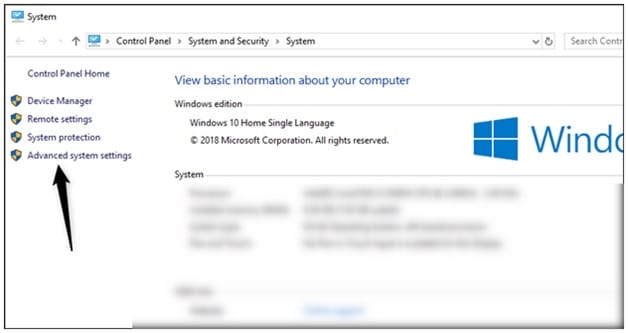
- This will open up the System Properties of your computer. Locate and click Advanced system settings on the left side panel.
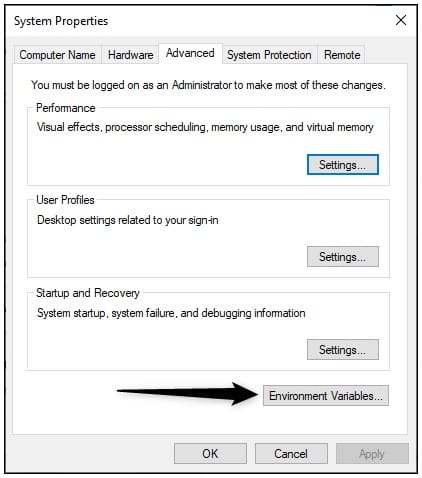
- Click on the Environment Variables button under the Advanced tab.
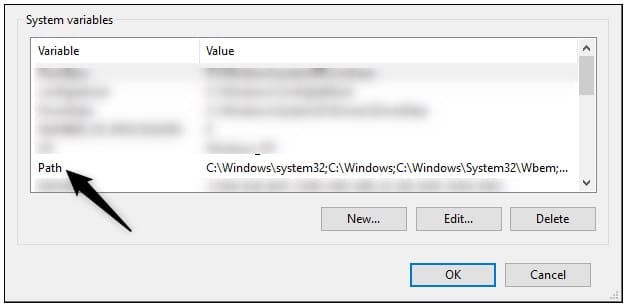
- Under the System Variables section, locate the Path variable and double-click on it.
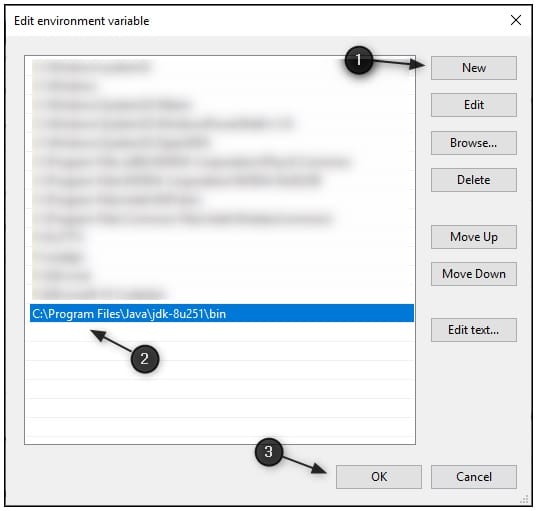
- Click on New and paste the location of the bin folder of the Java installation from step 1 and click on OK.
- You have successfully set the Java environment variable.

